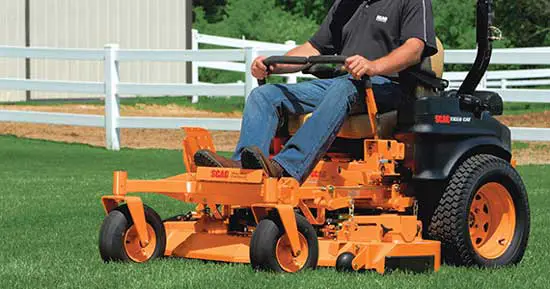
The riding mower is one of the most efficient machines to keep our gardening at the best level. It ensures that the process of maintaining our garden is both quick and fast, which is why we’ve come to love it back in our house.
Nonetheless, its performance gets compromised when the blades are not working at their best capacity, and sooner or later we’re going to have to replace them.
This article will walk you through the blade switching process. We’ll learn how to do it properly and which are some considerations you must keep in mind before doing it.
How To Change Riding Mower Blades-Tips For Beginners
Step 1: Comfort & Security First
Before we begin our operation, we want to look for a comfortable place where to park our mower.
We’ll need all the space we can get to avoid unpleasant intromissions that could get in the way of our work. Also, finding the right spot will keep the mower in a still position, avoiding it rolls down or any sudden movements that could cause an accident.
After you have the mower parked, make sure to activate its parking brake, turn off the engine and give it a moment to cool off if it is hot. Then, locate a block behind and in front of the tires.
Securing the mower in its place will allow us to move to our next step.
Step 2: The Right Tools
Next, we will need the proper tools to perform the blade change efficiently. If you don’t know which tools you’re going to need, it is better to follow the machine’s manual, or you could also look for a reliable source of information about your particular mower.
If you don’t have the information, there’s still a way to figure out the size of the socket we’ll need.
We want to place a rug or a protective cover above the ground’s surface right under the mower. This cover will protect us from suffering any scratches while we’re lying down working.
Put the socket on the ratchet, and crawl below the deck. You must put the wrench with the socket on the bolt. If the socket’s size is not the right one to fit on the bolt, try another one until it you find the one that fits.
Step 3: Removing the Blade
Now that you have the right socket, our next step is turning the switch of the ratchet to the right. Then, place both ratchet and socket on the mower’s bolt, and get a hold of the blade with your other hand.
After that, we’ll twist the ratchet contrary to the clock’s direction, which will loosen the bolt. Do it until it is easy enough to remove it by hand, without using the tools.
Step 4: Changing the Blade
If your mower has multiple blades, you want to repeat the previous step until you get all of them off. When you’re finished doing it, the next step is to change the old blades with our new equipment.
We recommend checking the old blades before doing the switching.
More often than not, the blades lose efficiency because they’re dull and need sharpening. Inspect them to confirm if they have cracks or any other type of damage. If that’s not the case, then you should use the grinder to sharpen it.
However, if the blade is indeed damaged, then there’s no other choice but to change it. Once you change it, make sure to place the long-edged side facing the sky.
Repeat the operation until you change all of the mower’s blade.
Step 5: Installing the Blades
Changing the blades is a quick process that shouldn’t take us long. After you finish replacing them, we must put them back on the mower.
Get back under the mower deck with the new blades, and insert the bolt in the hole. Then, clockwise, you want to tighten the bold. First, do it with your hand until it reaches a point when it becomes necessary to use either the ratchet or the wrench.
Then, flip the ratchet’s switch to your left, and put the socket on the bolt. During this step, you will need to grab the blade using your free hand. Turn the ratchet as much as you can.
Do the same process as much as you need to replace all the blades.
After the blades are on their place, turn them in a circle a couple of times to check they don’t hit each other. If they do, it’s because the length is not the right one and you’ll need to buy smaller blades instead.
However, if the blades don’t collide, then you’re almost there. Let’s continue with the next step.
Step 6: Testing the Mower
Before inspecting the new blades functionality, make sure you pick up everything you’ve used and store it. Take out the blocks that keep the tires on their place, pick up the rug, make sure there are no tools lying around, etc.
Now that you’re sure there is nothing in the way it’s time to start the mower. Check there are not any funny noises coming out of the mower deck. Then, use it to cut certain grass amount to check the blade’s cutting. If it’s good, then congratulations, you’ve changed your mower’s blades successfully.
Final Words
Changing the blades of your riding mower is not complicated at all. With the information provided from the manufacturer’s guide and our assistance of how to do it, you’ll have your machine back up and running in no time.
https://www.youtube.com/watch?v=oDA097W96PI