One of the most frustrating situations while doing masonry work is finding out that the bit is not drilling through the material, and we realize minutes later that we’re stuck in the same spot without progress.
The drill bits often lose their sharpness after a certain amount of time and use. It varies for each type, but it happens to everyone. To avoid losing the fluency of your work, we have three methods to sharpen your drill bits and continue doing your activities without dilatation.
Let’s take a look at what these methods are.
How To Sharpen A Drill Bit : Most Popular Methods
Method 1: Using a Bench Grinder
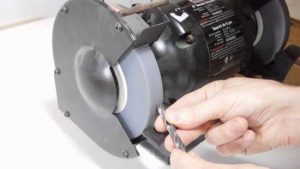
The bench grinder is one of the most effective sharpening methods for drill bits. It provides plenty of possibilities to do the task by our hands without spending hundreds of money on sharpening machines.
You must follow the next steps to sharpen your bits successfully using the bench grinder:
- For safety measures, you must place the sharpening machine’s guards at a 1/8-inch distance away from its wheel or belt.
- Turn on the bench grinder, and depending on which is your dominant hand, you want to use that one for guidance, while the other should work as the feeder. Then, put the bit’s land against the grinder while holding it at a sixty degrees angle.
- Apply enough pressure to cut the land.
- Move your hand to the right looking to produce a chisel angle. This angle must be at forty-five degrees from the bit’s lip.
- Now, use both of your hands at a slow pace to achieve quality cutting, the perfect shaping and a constant rotation at the same time.
- Then, repeat the previous steps while rotating the bit 180 degrees, which is a process that will sharpen the other lip too.
Method 2: The Angle Grinder
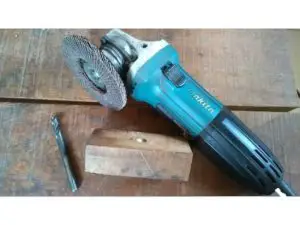
Using an angle grinder is another suitable solution for sharpening your drill bits. It is highly effective for the task, but we do recommend getting a jig to make the sharpening process easy. To make the jig, you only need a scrap wood piece. Then, you’ll be ready to continue with the next steps:
Making the Jig
Before making the jig, remember to do it according to the drill’s point angle you’re looking to sharpen. For instance, if the angle is at 135 degrees, you must make a 67.5 degrees line on the block, and then drill the hole in the block following the line. The purpose of this step is to allow the drill bit to align perfectly over the block’s surface.
The Positioning
Place the jig on a bench vice, and make sure the drill bit is properly attached to it. Then, hold the bit using your hand and use enough pressure against the hole. With the remaining hand, grab the angle grinder. This position allows the bit to be parallel to the surface of the wooden block.
Sharpening the Cutting Edge
Now, turn on the grinder. Sharpening the land requires small pressure against the bit. Then, proceed to do it on the other side by doing a 180-degree rotation.
Sharpening Relief
Take the bit out of the jig. Then, hold it firmly on to the bench vice to sharpen each side’s reliefs. Maintain your focus on the task, because it could be tricky.
Method 3: The Dremel Sharpening Station

This sharpening station handles bits of different sizes, going from 3/8-inch to a smaller 7/64-inch bit.
To use it properly, follow these steps:
- Place the Dremel on a steady table. Keeping it from moving is a must.
- Attach the drill bit guide right on the motor unit.
- Take the bit holder off the guide, and place the bit into it.
- Clockwise, turn the holder’s knob. Make sure it is properly fit.
- Place the bit holder at the drill bit guide’s alignment block, which will set up the angle. Then, press on the V block against the holder, do this operation while you push the bit upward and rotate it slowly to meet the right angle. You can tighten the knob completely only when both the drill and V block slide up to the depth pin.
- Switch on the Dremel, and attach the holder at the sharpening block. Make sure the sharpening block has a solid grip on the bit holder, and proceed to rotate the guide left and right. Continue doing it until the grinding noise stops.
- Then, flip over 180 degrees, and repeat the previous step until the grinding sound stops once again.
- Turn the Dremel off, and inspect the bit has the correct sharpening.
Conclusion
We’ve covered different sharpening methods for the drill bits. If you’re a handyman that has to use drilling bits regularly, replacing them as soon as they lose their sharpness is not an option because they are quite expensive.
Instead, with the right tools, you can prolong the drill bit’s lifespan and continue using them for your everyday operations as if they were brand new.
https://www.youtube.com/watch?v=Qze0GyBxBRY