
Having a concrete wall often makes it difficult for us to decide to remodel it. There’s a general feeling that, if we mess it up, then it is ruined. Or perhaps you don’t know which tools work best for these walls.
It is particularly complicated when we talk about hanging pictures. We faced this dilemma back at home, but we’ve found various methods that work great for hanging pictures on a concrete wall.
We’ll share these methods with you to help you have those beautiful memories on your home, right where you can see it every time you and your family enter the house.
3 Most Common Way to Hang Pictures on Concrete Wall
Method 1: Using Adhesive Hooks

While most adhesive hooks are strong enough to keep your pictures on the wall, you must buy a couple capable of holding about 8 pounds, or 3.6kg of weight.
The adhesive hooks are an outstanding solution because they don’t require we drill holes in the wall. Instead, they have adhesive backings, which can stick firmly to the wall. Either way, you must know the weight of the picture or the object you want to hang to choose the best adhesive hooks.
For better support, you could use two hooks, or as much as you consider necessary. It will all depend on the weight of the frame, which is different for every case.
- Preparing the Wall
If you want to get a firm hold, you must clean the wall using supplies like alcohol. Use it with a paper towel or a rag to clean the area, and leave it free of debris or other unpleasant elements that could get in the way.
Also, the adhesive hook takes advantage of a clean surface providing a firm support in the wall.
If you don’t have alcohol nearby, then use any substance you consider it will keep the wall clean. Soapy water is a good choice, but any supply capable of cleaning the wall will do the job. Make sure the spot is dry after the cleanup.
- Marking the Spots
Using a small pencil, mark the exact place where you will be installing the hook. It is better to avoid mistakes while doing this operation, which is why you need to be as precise as possible.
- Sticking it to the Wall
Remove the plastic covering the adhesive and press it to the wall for about 30 seconds.
After taking off the paper lining at the back of our hook, we’ll need to line the hook straight and press it with enough strength as long as needed. For most cases, 30 seconds are enough, and you must release it afterward.
- Let the Adhesive Dry
For the next 30 to 60 minutes we’re going to let the adhesive do its job and get a solid grip to the wall. Once you consider it is all set, do a little test by hanging certain items on the hook.
If by any chance your item is heavier than expected, and it rips the hook off the wall, then you’re going to need other hooks capable of withstanding a heavier weight.
Method 2: Using Hardwall Hangers
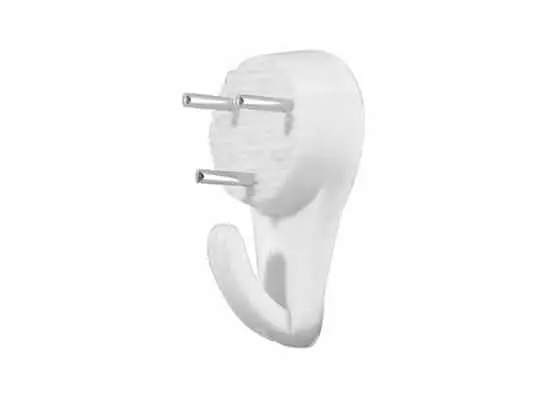
Get hardwall hangers capable of resisting up to 25 pounds, or 11 kg. They are designed to work well with concrete or brick walls, and hanging pictures on them is easy and quick. The installation process is fast, which means you it will be up and ready to hold your frames in little to no time.
These hangers include sturdy pins that anchor its base in the wall.
You’ll need two hangers for better support and a hammer.
- Marking the Spot
Mark the perfect spot on the wall where you intend to install the hanger. In case you decided to use two hangers, you must measure the distance between them, and make sure it matches the correct width of your picture.
- Installing the Hangers
Place the hanger on the marked spot, and hold it still with your hand while you use the other one to nail the four pins in the wall, but only halfway.
Then, release it to check whether or not it maintains its position, and if it is at the correct position. After confirming that it is where you want it, continue hammering the pins.
During the first phase, you might want to hammer the pin gently. It will allow you to remove it quickly if you’re not happy with the results, but it is also a safe way to do it while keeping your fingers safe.
- Test
Hang your desired picture and inspect if it is straight. Feel free to make any adjustment you consider necessary. Then, behold the result of your hard work: a beautiful picture depicting an incredible moment hanging on the wall.
Method 3: Using Masonry Anchors

The anchor’s design features plastic most of the time, and it includes the necessary screws you must insert in it. However, you will still need a drill and its respective masonry bit of the same size of the anchor.
If you want to go for a safe bet, you could get one of the masonry kits. These sets include the anchor, all the screws, and a precise masonry bit. Again, for better support, you could use two anchors.
- Using the Correct Tool
So far, we’ve avoided doing considerable damage to the wall, but for this method, we’re going to have to do it.
Using the hammer drill, start working on the wall until you get the results you want. The regular electric drill works well for this task, but using a hammer drill is faster and easier.
- The Drilling Process
Of course, it is better to mark the spot before starting your work because it gives you a better idea about where to drill.
After that, put the bit over it, hold it tight, and start working. People recommend drilling at a slow speed for better results, but it is entirely up to you to decide what works better for your wall.
- Placing the Anchor In the Hole
Tap both of your anchors in the hole you created. Do it until the hanger is flush with the wall. You want it to be as fit as possible, but not too much because it will complicate the hammering process.
If you have a hard time tapping the anchor, then it might be better to expand the hole a little bit, instead of pushing it.
- Installing the Screw
Put the screw in the anchor to secure its place. For this task, you can use a screwdriver or a screw bit from your drill. It works either way, and you must stop your operation right before it is flush. Doing it this way allows you to use the space for adjusting the wire of the picture your hanging.
And there’s that. Not much else to do except to enjoy your new hanging picture on the wall.
Final Words
We’ve gone through three different methods for hanging pictures on the concrete wall. Each process may share similarities with the other, but every person has a favorite way of doing it. Ultimately, deciding which one is better for your house is a task that relies upon you, and nobody else.
https://www.youtube.com/watch?v=F7_K_pqXRaw