If you’re a science or engineering student, you might need to measure the diameter of wires. Vernier calipers won’t work here since the wire might be too thin.
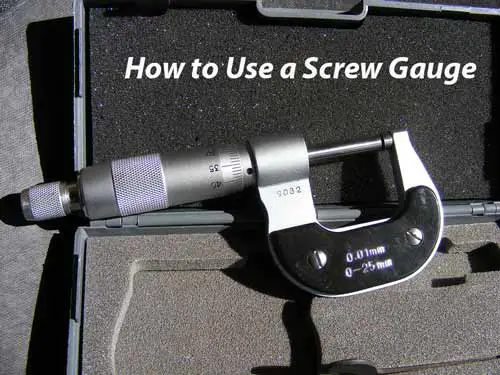
Instead, what you need is a micrometer screw gauge.
Don’t know how to use it?.Well, that’s not a problem, since we’re here to help you out.
How? you may ask. Now, in this article, we are going to detail exactly how to use a screw gauge and also explain its parts.
So, let’s dive in.
Parts of a Screw Gauge
Before you can go on using a screw gauge, you should know more about the parts and in essence, the underlying mechanics behind how it works. The parts that make up a screw gauge are:
Frame
The frame of the screw gauge is a U-shaped metallic structure that is the most eye-striking feature of the instrument. The frame consists of two studs that are used to hold onto the object being measured tightly.
The smallest stud is known as the anvil, and the larger one is known as the spindle. The anvil is fixed, but the spindle rotates. These two studs are parallel to each other. This is the key part of the instrument.
Barrel
Next, you will notice a cylindrical tube connected to the frame. This is known as the Barrel or Sleeve. You’ll notice a small scale over here. This scale is known as the main scale and takes the primary reading of the length of the object you are measuring. This part of the screw gauge is stationary.
Screw
Finally, we come to the screw. The screw is what allows us to measure such small distances or lengths. At the end of the cylindrical tube, you’ll see a part called a thimble. While the barrel contains the main scale, the thimble contains the secondary or vernier scales.
The thimble is rotated to move and adjust the spindle, which, when properly set, will allow us to measure the length of the object.
Ratchet
Alongside all of these, there is a built-in safety device of sorts in the micrometer screw gauge known as the ratchet.
When you are working with the screw gauge and adjusting the spindle, you might end up rotating it too much or applying too much pressure. The ratchet works as a limiting device and prevents the spindle from moving too much and thus preventing damage to the screw gauge.
How to Use the Screw Gauge
Now that you are familiar with the various parts of the screw gauge, you should familiarize yourself with the general procedure of how to measure objects using it. We will use the wire mentioned in the beginning as the object to be measured. The general procedure is as follows:
Main Reading
This reading is taken from the main scale, which is located on the sleeve. There is a linear scale. First, you will need to figure out the length per division of the scale. This varies from screw gauge to screw gauge.
To find the length per division, see how many lines or graduations make up to a particular length (usually 1 or whatever number is first visible on the scale), and simply divide the said length with the number of graduations.
Once you have figured this out, the main reading is the last graduation that shows up on the main scale once you have secured the wire tightly. These readings are given in millimeters.
Secondary Reading
This reading is taken from the thimble, which contains a rotating vernier scale. The first thing you should know that instead of the length being displayed on the scale, it is the number of divisions being displayed.
To find the length, you simply have to divide the division number you got by 100. This will give you the length in millimeters. To find the secondary reading, you need to find the point where the lines on the main scale and the lines on the rotating scale coincide.
The coinciding number on the rotating scale is your divisions. Simply perform the calculation explained above to get your secondary reading. In the case where the lines do not coincide (this rarely happens), you can opt to approximate to the nearest division.
Finally, the length of the measured object is the sum of the main and secondary readings (in millimeters).
Benefits of Screw Gauge
Here are some of the benefits of using a screw gauge.
Able to Measure Tiny Lengths with Precision
If it wasn’t obvious before, the main advantage of a screw gauge comes from its ability to measure small lengths to a great degree of accuracy. It is an indispensable tool due to its ease of use.
Versatile
Screw gauges can be fitted with small adjustments or additions to fit a wide variety of situations and thus have wide applications.
Durable
These instruments are quite robust with a built-in limiting device preventing the parts from being damaged. As a result, they have a long usage.
Provides Value for Money
It is quite cheap and cost effective, which along with its long-life span, makes it quite reliable.
Things You Need to Be Careful About
While using the screw gauge, there are two instances of errors that might occur and give you trouble. They are:
Zero Error
Simply put, this is the error in the reading that occurs when the initial reading on the scales isn’t zero. Before you go into measuring an object, check to see if the scales are set to zero or not.
Now there’re 2 types of zero error; positive and negative. If you find the 0 of the circular scale below the level of the pitch scale baseline, it’s a positive error.
However, if the circular scale 0 is seen to be at a higher level than the baseline of the pitch scale, it’s a negative error.
You can either adjust the spindle and reset it back to zero or simply account for the error in the calculation.
Parallax Error
This error occurs when you end up taking the reading without having your eye level parallel to the scale. This is quite an easy error to avoid but somewhat common to make. Always keep your eye level parallel when reading from the scale.
Final Words
Hopefully, after these tips and guidelines, you know how to better operate a screw gauge.
While there are other types of screw gauges, many of them rely on similar principles but often have one or two differences in construction and application. Needless to say, these are handy instruments, and learning to operate them is quite beneficial.